This section allows you to view all posts made by this member. Note that you can only see posts made in areas you currently have access to.
Topics - Depome
1
« on: October 22, 2010, 12:34:24 pm »
Cashew and craisin museli barsIngredients:140g butter 30g golden syrup 120g plain flour 70g brown sugar 100g oats 20g rice bubbles 60g cashew pieces (or cashews) 40g craisins or plain cranberries Preparation:Place butter and golden syrup in  Melt on 60 degrees speed 1 for 1 minute, then turn up to speed 3 for 1 minute more. Add dry ingredients to and combine on  + speed 1 for 20 seconds, then turn up to speed 3 for 20 seconds more. Empty bowl into slice tin and press down with the back of a spoon. Bake for 20-30 minutes in a moderate oven, approximately 180-190 degrees Celsius, until golden brown. Remove from the oven and cut roughly into pieces as museli mix will still be soft. Allow to cool completely in slice pan, then cut through once more and remove from pan. Photos: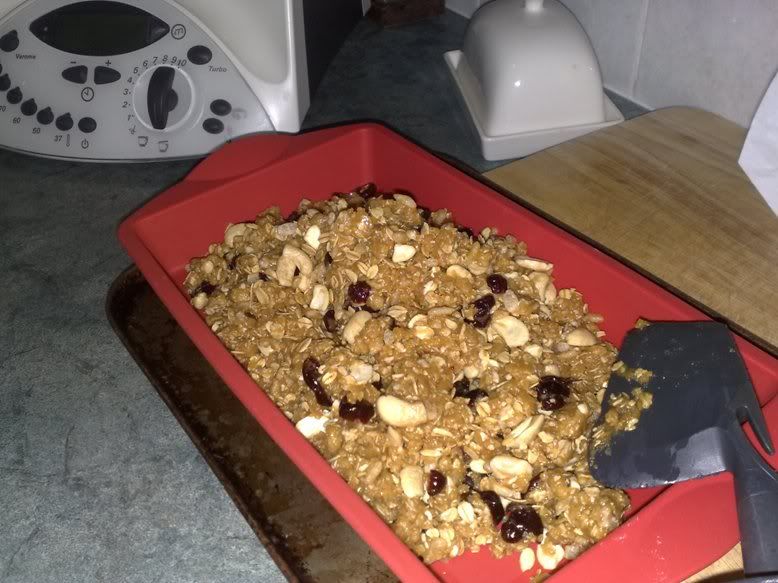 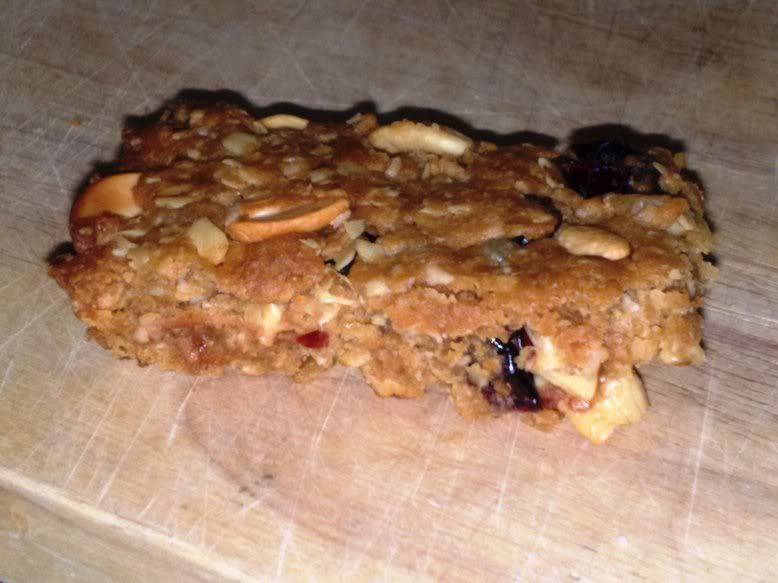 Tips/Hints: Tips/Hints:I buy raw cashew pieces from a Go Vita store as they're much cheaper than whole cashews. If you have whole cashews then it would be worth pulsing them a couple of times before setting them aside as slicing the museli bars up can be difficult with big firm pieces like cashews in the way. Supplement other nuts, fruit, coconut and the rice bubbles if you wish, but do so by volume rather than weight. Try sprinkling some choc chips over the mix before pressing in to place, or drizzling melted chocolate over the top when it has cooled to room temp. Sometimes the chocolate facade is enough to hide the fruit and nuts from the children!
2
« on: September 20, 2010, 08:37:59 am »
I've just found Cyndi's recipe on here and I will have a go at that, at some point. But I'm interested in making a more basic GF flour, one that mimmicks the commercial versions. I have two commercial brands here at the moment, and both list maize, tapioca, brown rice and guar gum in that order. I'm wondering if anybody has played with these ingredients and found a good ratio to replicate the commercial GF flours. At around $7.50 p/kg for White Wings, and $6 p/kg for Orgran there is no way that I'm going to be buying them regularly  And I'm thinking that since it is only Miss 5 who seems to have gluten OR wheat issues (undecided currently) we can really only afford to to provide HER with GF alternatives: it will likely be too expensive to bake GF for the whole family. UNLESS making my own turns out to be quite affordable...! Has anyone else read this article, called Bread Dread? It's quite intriguing... http://nourishedmagazine.com.au/blog/articles/bread-dread-are-you-really-gluten-intolerant
3
« on: March 11, 2010, 05:38:47 am »
Refrigerator Cookies - the variety that you make with just three basic ingredients, can roll into a log and store in your fridge for slicing into rounds later on, or freeze them to be defrosted and sliced. Mine didn't last that long This is a Women's Weekly recipe, altered a little. 250g butter - softened (40 seconds, 50 degrees, speed 4 if straight from the fridge) 160g icing mixture 375g plain flour Soften butter, add icing mixture and mix on speed 6 for 10 seconds, then scrape down sides and repeat. Add 200g plain flour, mix on speed 6 for 10 seconds, then scrape down the sides and add the remaining 175g flour. Mix again on speed 6 for 30 seconds this time, using spatula through the lid to push some of the dough down on to the blades. This is quite a dry dough so it works REALLY WELL in the TMX, because you can get it out really easily  You're going to have to knead it a little if you want to roll it and store it in the fridge, so it doesn't matter if the flour isn't totally incorporated. When it's done, remove lid, turn bowl upside down on the benchtop (won't need to flour it as the dough isn't sticky) remove the base of the bowl and push on the bottom of the blades so that the dough/blades drop on to the bench. Remove bowl, and pull the blades off the top of the dough. Use the spatula to push out any dough around the blades. Knead dough lightly and roll into two logs, about 25cm long. Wrap in plastic wrap and refrigerate or freeze. To cook them, you need to slice them into rounds once they've been refrigerated for about an hour. Slice them about 1cm thick, and cook in preheated oven on 170-180 degrees for about 10-15 minutes. Optional flavours: Lemon: Blitz the rind of one lemon before adding the butter and continuing as above. Double choc: Replace 30g of the flour with 30g of cocoa, and before adding the second batch of flour, mix in 80g of choc chips using Choc hazelnut: Roughly chop half a cup of hazelnuts before adding butter and continuing as above, but switching some flour for cocoa as with double choc recipe. I make these often, and I usually refrigerate and slice, but last night I just rolled them in to balls instead. Filled two large baking trays and had enough for a small log that I put in the freezer  Photos of cocoa and white choc chip cookies, rolled into a log and sliced, and also lemon rind flavoured that have been rolled in the hand rather than refrigerated in between. Also pics of dough to show how easily it comes out of the bowl. 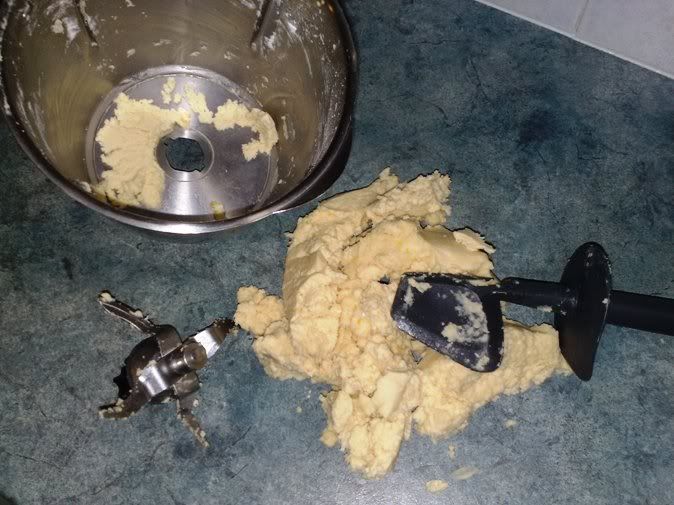   members' comments members' commentssimplyrhonda - What a great recipe! Thank you. Made these the other day. Made one roll for the freezer and used the rest of the dough to make small balls. Got my youngest daughter to press a freckle into the centre. Kids loved them. Will definitely use this recipe but will probably add some vanilla. Cheers.
4
« on: March 11, 2010, 05:27:07 am »
Name of Recipe: Broccoli and Blue Cheese Pasta Number of People: 4+ Ingredients:800g broccoli or approx 1.5 large heads 375g wholemeal pasta 600g milk 50g plain white wheat flour 30g butter salt and pepper 150g creamy blue veined cheese Optional grated parmesan to serve (really nice) Preparation:Cut the broccoli into large florets, but small enough to fit in the Varoma. Using large florets means you're using more of the nutritious stem, which is only going to get puréed anyway... Add to the Varoma, with 600g tap water in the and cook on Varoma temp for 20mins on speed 2. When the broccoli has finished, remove the Varoma from the bowl and set aside. Empty the water out of the bowl, into a large pan that you will cook the pasta in. Top that up with tap water and bring to the boil, salt, and add 375g ish of wholemeal pasta. No need to wash or dry the bowl properly. Now add the milk, flour and butter to the and cook at 90 degrees for 12 minutes on speed 4. Your pasta should be almost cooked so quickly add the broccoli to the bowl and blitz on speed 8 for 30 seconds (no heat). Cut the cheese into about six wedges and drop them one at a time into the bowl, with the blades turning on speed 2. Now add salt, pepper and nutmeg to taste (remembering that adding parmesan to serve will add a lot more salt to the flavour). You may wish to cook at 90 degrees for a further two minutes, on speed 3. Drain the pasta and pour the sauce over the top. At this consistency it should be good to coast the pasta, without setting like custard  Photos: Photos: Doesn't last long enough around here, sorry! Tips/Hints:My DD8 hates cheese. My DD4 loves cheese, but it getting funny about it at times. She ate some of the blue cheese straight from the packet last night and declared it horrible, as I warned her. DH and I don't like it straight, though I can tolerate it much better than he can. Both of my girls sat at the table repeating how delicious it was! DH and I thought it was hilarious! I do suggest you add half the cheese, then try the sauce, and add more according to your taste. Truly though, this quantity (150g) gives the broccoli sauce a bit of a flavour kick without making the sauce powerful, as blue cheese is itself. Grate the parmesan first if you wish to add it later, or just use a peeler to drops flakes of parmesan on top to serve. This quantity went VERY FAR last night, which surprised me. Perhaps I made more sauce than normal? First time I've done it in the TMX, with the EDC béchamel sauce for quantity guidelines, so probably did end up with more sauce. So two adults here and two children aged 8 and 4, we've ended up with two lunch-size portions left in the fridge  I must say though, that using wholemeal pasta makes a big difference to the amount that you can eat. It is VERY filling.
5
« on: February 18, 2010, 09:36:40 am »
Name of Recipe: Budget Meatless Fajitas Number of People: 2 adults and 2 children Ingredients:To serve: Cheddar cheese Shredded lettuce Tortillas: 60g oil 370g plain flour 2 tsp salt warm water Filling: 1 small onion 1 large clove garlic 2 tbsp oil 530g fresh tomatoes (or substitute) 50g TVP (textured vegetable protein - fake beef mince) 1/4 tsp cayenne pepper 1 1/2 tsp ground cumin 1 tsp dried oregano 1/2 tsp sweet paprika 1 tsp dried rosemary black pepper, ground 2 tsp TMX vegetable stock concentrate (or substitute) 420g can cannellini beans 50g water Preparation:1. Grate cheddar cheese and set aside in the fridge until serving time. Shred the washed lettuce and place in the fridge. 2. To make tortillas, add oil to followed by the salt and the flour. If you have any ready-made spice blends add them now. Try 2 tsp max of something like 'grill seasoning' or 'steak seasoning' for something a little smokey in flavour. Add 1/2 MC of warm water and turn on to speed 4. With blades running keep adding 1 tbsp approximately of warm water until the dough comes together in a ball, like regular glutenous bread. It will take up to about 1/2 cup of warm water, but it depends entirely on the flour that you use, the temperature and humidity of the room. You need to get a feel for a good dough rather than simply following a formula. Once the dough feels like the right texture, knead it on the  setting for 2 minutes. Remove dough from the bowl, set aside, covered for at least half an hour. Remove as much dough from the bowl as possible, perhaps by removing the blades to help, but don't worry about washing it. 3. Quarter the onion, peel the garlic, and add both to . Chop on speed 6 until the "I'm working hard" noise subsides and the onion is mostly stuck on the sides of the bowl  . Then add oil and sauté for 4 minutes on speed 1 at varoma temperature. 4. Add fresh tomatoes, quartered, or a substitute, plus the TVP 'mince'. Set at 15 minutes on speed 1, at 100 degrees. 5. When the timer says 12 minutes remaining, increase speed to 4 for about 10 seconds to start breaking up the fresh tomatoes, then drop back to speed 1. Add the cayenne pepper, cumin, oregano, sweet paprika, rosemary, black pepper and stock. 6. When finished, add the drained can of cannellini beans and the water. Cook for 5 minutes on speed 1 at 90 degrees. The set aside in the Thermoserver while you roll and dry fry the tortillas. 7. You should get around 7 tortillas out of the dough, but that depends what size frying pan you are trying to fit them in. We got two medium-large tortillas for Mum and Dad, one large for each child, and one small left for the eldest child. So divide your dough into balls that are a bit larger than golf balls, and roll them into circles on a floured benchtop. The oil in them should make them pretty elastic and easy to handle. Roll them to about 3mm thick then dry fry them in a hot frying pan until browned on each side. They get big bubbles in them that you may need to pop, and are inclined to REALLY cook at the peak of those bubbles so try to flatten them out. I find they stay softer and more pliable than commercially made/bought tortillas I have no idea how long they'd last in an airtight tub though as I only ever make 'enough'. Place a tortilla on a plate, dollop two big spoons of bean mix in a line down the centre, top with cheese that will begin to melt, and then shredded lettuce (if not diced tomato and cucumber too ). Roll however they work for you  Photos: Photos:     Tips/Hints: Tips/Hints:I used ready ground spices, but you can roast and grind them yourself, of course. We actually have a little left over bean mix which DH will no doubt take to work for lunch tomorrow with some bread
6
« on: February 18, 2010, 09:31:37 am »
Name of Recipe: Budget Meatless Fajitas Number of People: 2 adults and 2 children Ingredients:To serve: Cheddar cheese Shredded lettuce Tortillas: 60g oil 370g plain flour 2 tsp salt warm water Filling: 1 small onion 1 large clove garlic 2 tbsp oil 530g fresh tomatoes (or substitute) 50g TVP (textured vegetable protein - fake beef mince) 1/4 tsp cayenne pepper 1 1/2 tsp ground cumin 1 tsp dried oregano 1/2 tsp sweet paprika 1 tsp dried rosemary black pepper, ground 2 tsp TMX vegetable stock concentrate (or substitute) 420g can cannellini beans 50g water Preparation:1. Grate cheddar cheese and set aside in the fridge until serving time. Shred the washed lettuce and place in the fridge. 2. To make tortillas, add oil to followed by the salt and the flour. If you have any ready-made spice blends add them now. Try 2 tsp max of something like 'grill seasoning' or 'steak seasoning' for something a little smokey in flavour. Add 1/2 MC of warm water and turn on to speed 4. With blades running keep adding 1 tbsp approximately of warm water until the dough comes together in a ball, like regular glutenous bread. It will take up to about 1/2 cup of warm water, but it depends entirely on the flour that you use, the temperature and humidity of the room. You need to get a feel for a good dough rather than simply following a formula. Once the dough feels like the right texture, knead it on the setting for 2 minutes. Remove dough from the bowl, set aside, covered for at least half an hour. Remove as much dough from the bowl as possible, perhaps by removing the blades to help, but don't worry about washing it. 3. Quarter the onion, peel the garlic, and add both to . Chop on speed 6 until the "I'm working hard" noise subsides and the onion is mostly stuck on the sides of the bowl . Then add oil and sauté for 4 minutes on speed 1 at varoma temperature. 4. Add fresh tomatoes, quartered, or a substitute, plus the TVP 'mince'. Set at 15 minutes on speed 1, at 100 degrees. 5. When the timer says 12 minutes remaining, increase speed to 4 for about 10 seconds to start breaking up the fresh tomatoes, then drop back to speed 1. Add the cayenne pepper, cumin, oregano, sweet paprika, rosemary, black pepper and stock. 6. When finished, add the drained can of cannellini beans and the water. Cook for 5 minutes on speed 1 at 90 degrees. The set aside in the Thermoserver while you roll and dry fry the tortillas. 7. You should get around 7 tortillas out of the dough, but that depends what size frying pan you are trying to fit them in. We got two medium-large tortillas for Mum and Dad, one large for each child, and one small left for the eldest child. So divide your dough into balls that are a bit larger than golf balls, and roll them into circles on a floured benchtop. The oil in them should make them pretty elastic and easy to handle. Roll them to about 3mm thick then dry fry them in a hot frying pan until browned on each side. They get big bubbles in them that you may need to pop, and are inclined to REALLY cook at the peak of those bubbles so try to flatten them out. I find they stay softer and more pliable than commercially made/bought tortillas I have no idea how long they'd last in an airtight tub though as I only ever make 'enough'. Place a tortilla on a plate, dollop two big spoons of bean mix in a line down the centre, top with cheese that will begin to melt, and then shredded lettuce (if not diced tomato and cucumber too ). Roll however they work for you Photos:Tips/Hints:I used ready ground spices, but you can roast and grind them yourself, of course. We actually have a little left over bean mix which DH will no doubt take to work for lunch tomorrow with some bread
7
« on: February 15, 2010, 03:45:14 am »
Name of Recipe:Onion Bhaji recipe # 203074 at Recipezaar.com but I have altered and converted. Number of People: Makes about 24 Ingredients:1/2 tsp fennel seeds 1/2 tsp onion seeds (I couldn't find any, so omitted them) 1/2 tsp cumin seeds 150g chick peas (to make gram flour) 1/2 tsp chili powder 1 tsp turmeric 1 tsp baking powder 2 green chilies, chopped into chunks, deseeded if you wish 1 cup fresh coriander leaves water oil (for deep frying - try peanut or sunflower) 2 large onions, sliced (by hand, yes sorry ) - cut onion in halves, then each slice that you cut should probably be cut into three otherwise the bhajis will be enormous. Preparation:Add seeds to bowl and roast on 100 degrees, sp 1 for 2 minutes, then blitz on sp 9 for 30 seconds. Add chickpeas and mill for 1 minute on sp 10 - DON'T FORGET YOUR EAR PLUGS! This is seriously the loudest procedure I have ever had with the TMX Add chili, turmeric, baking powder and fresh chillies and blitz for 10 seconds on sp 9. Add fresh coriander and mix for 10 seconds on sp 7. Now you need to make a batter with this powder, that includes the sliced onion. You will find it easier to empty the flour mix into a bowl, stir in the onion, then keep adding water until the batter is sticky enough to hold a tbsp of onion together ENOUGH. Drop tbsp of the mixture into hot oil in a saucepan or wok and 'deep fry' for about 1 minute each to ensure the onion is cooked. While these have enough bite to be tasty, mine were absolutely beautiful dipped in homemade mango chutney Tips/Hints:Original recipe says it makes 12 but for 2-3 bites each size, I got about 24.
8
« on: February 15, 2010, 02:52:35 am »
Taken from a January TMX e-mail newsletter Makes a 20cm square cake tin Ingredients: 200g sun dried banana (took some finding........ but I think banana chips may be fine too) 100g sundried apple 100g almonds 100g hazelnuts 100g rolled oats 30g coconut 3 tbs fruit juice concentrate (I used orange and mango, not the apple or pear suggested in the recipe) juice of 1 lime (i forgot!) pinch of sea salt Method: Place fruits, nuts, oats and coconut into bowl and chop for 20 seconds on speed 7-8 until it looks a bit like breadcrumbs. Add remaining ingredients and mix for 1 minutes on speed 9 until it starts to become a little sticky. Blend further if necessary. Press into 20cm square baking tin and sprinkle with extra coconut if you wish. Use the measuring cup to press it down firmly. Refrigerate and cut into squares to serve. Comments: Despite what it says in the ingredients list (which I didn't copy perfectly), it clearly doesn't matter if your oats are rolled or 'quick cook' pieces, and if your coconut is dessicated or shredded. Just buy what's cheapest because it's going to get mashed anyway! Also, I didn't quite have enough hazelnuts but when I read it was going to get completely chopped, I decided to top up with hazelnut meal which I did have. I couldn't get apple or pear concentrate and I don't think it matters at all, unless you're avoiding high natural food chemical of course. I tasted this before putting it in the cake tin, and while I really like it, I knew one of my children would be picky with it. So I added 50g of milk chocolate melts and gave them a quick blast with everything else. YOu can see bits of chocolate, so they're not quite as fine as the other ingredients. It certainly tastes sweater now, and less 'raw nut' which will make my Miss 8 happier The choice of juice will have changed the flavour too. So it's in the fridge setting at the moment, and I think it tastes great, took about 2 minutes to make (the directions were excessive I found, was quicker than that) and is going to be a fab raw snack in the lunch boxes this week Photo: 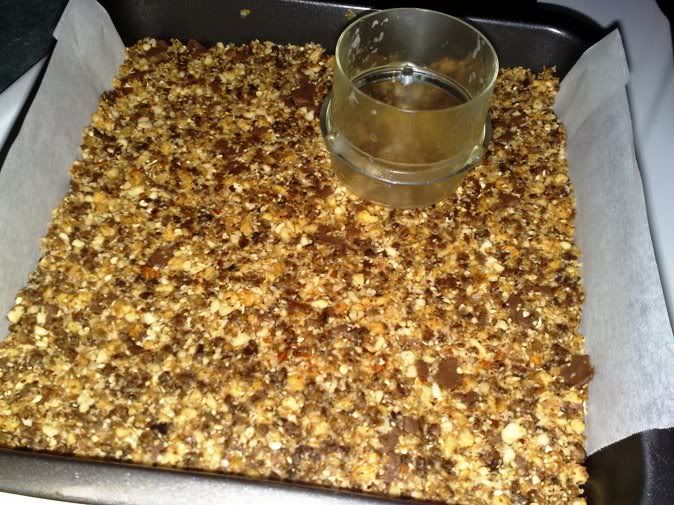 '' Member's CommentsChelsea - I made the banana slice this afternoon. Sadly it wasn't a hit with the kids even with choc chips. I don't think the lime juice went at all well with these ingredients (and the ingredients are a bit too expensive for me to try again without it). Worth a try though. The texture is nice but the flavour isn't crash hot. I don't think I'm keen on the bananas either. Depome - Infinitely improved by using: dried apples dried sweetened cranberries dry banana chips (optional) oats almonds coconut orange and passionfruit Homebrand fruit juice concentrate
9
« on: February 15, 2010, 02:43:04 am »
Name of Recipe: Thermomix Coconut & White Chocolate Mousse, featured in the Valentine's Day e-mail newsletter Number of People: I think 10, but the recipe didn't specify, like the others  But it does tell you to cut 10 circles in the sponge and place them in to glasses. Ingredients:Sponge: 2 eggs 70g caster sugar 70g self-raising flour Mousse: 270g coconut milk (I used cream because it was already open) 10g gelatine 500g white chocolate 100g cream cheese (I used light) 670g thickened cream (I had to use about 40g lite/unwhippable cream) Syrup: 40g boiling water 40g caster sugar 170g frozen fruit, e.g. raspberries Preparation:How to make the sponge 1. Insert Butterfly and add eggs and caster sugar into TM bowl. Whip for 2 minutes on speed 3. Remove Butterfly. 2. Set dial to closed lid position, add flour and fold through for 10-15 seconds on Interval speed. 3. Spread flat on a greased baking tray. Pre-heat oven to 180°C and bake for approx. 15 minutes until golden. Set aside to cool. How to make the mousse 1. Place coconut milk and gelatine into TM bowl and cook for 6 minutes at 50°C on speed 3. 2. Add white chocolate and mix for 3 minutes on speed 6. 3. Add cream cheese and mix for 1 minute on speed 6. Allow to cool, but not set. 4. Insert Butterfly. In a clean TM bowl, whip cream for 10-20 seconds on speed 4. 5. Gently fold the cream through the mixture. How to assemble 1. Evenly distribute half the mousse in the bottom third of each cup. 2. Spread half the raspberries on top. 3. Cut 10 round pieces of sponge and place on top of the raspberries. 4. To make the syrup, dissolve the sugar in boiling water. Allow to cool then pour on top of the sponge pieces. 5. Place the remaining mousse on top then the remaining raspberries. Allow to set in fridge for a minimum of 4 hours. Recipe taken from Chef Laurent Caters for Families www.cheflaurent.com.auPhotos:Half way:  Sponge layer added (use a cookie cutter!) 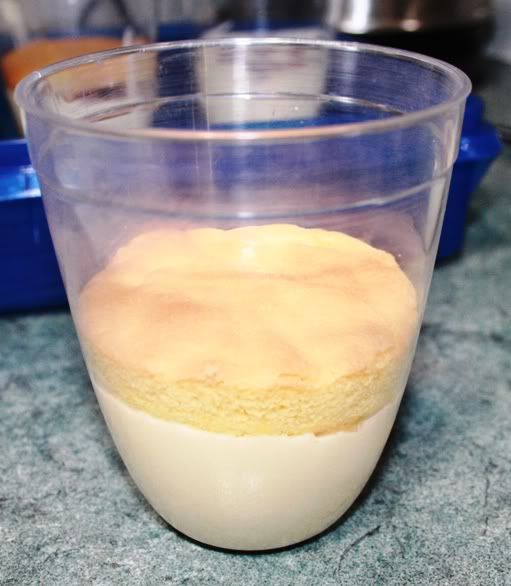 Finished:  Tips/Hints: Tips/Hints:I made 7 mousses with the full recipe above, and put them in plastic 'picnicware' tumblers from Woolworths, they hold about 400ml. They were enormous really because the mousse is so rich. I think smaller ramekins, and mousses half the size would have been much nicer. You need to whip the cream rapidly as the rest of the mousse sets very quickly with the gelatine in it, and then you're left with some chunks that you can't do much about as you have to fold the cream through rather than stir. Better to stir the mousse quickly before adding the cream. Recipe doesn't call for the cream to be whipped for very long at all. I did have a little bit of light cream in mine which would've reduced the whipping, but I did also whip more than recipe stated. The mousse was pretty heavy overall, not light and fluffy as most people would prefer I'm sure. I'm not comparing to supermarket yoghurty mousses either, but others that I've made. Add that to large portions and you feel bloated just thinking about it! I did use coconut cream too which wouldn't have helped. I'd suggest you whip the cream for longer. Re: coconut cream... when the mousse was at room temp I could taste the coconut, but I thought it was lost by the time it had been chilled, which is odd given it was cream that I'd used, rather than the milk stated in the recipe. I think I would top the mousse with a little shredded coconut next time, might help the flavour that little bit more. The idea is great, and the flavours are in there, but I think a little tweaking is needed to make the most of this mousse, to make it lighter and smaller.
10
« on: February 08, 2010, 04:36:56 am »
Anyone have a spice blend for a biryani masala? I've watched a few vids on YouTube now and reckon I could put a veg biryani together, but I don't have a masala ingredient list. Actually, a TMX biryani recipe of any kind would be appreciated depome77 at netspace dot net dot au
11
« on: January 31, 2010, 01:20:36 am »
Is it possible to make these at home, or are they in the same basket as puff pastry? It's a rare rainy day in very dry Toowoomba, and I'm thinking about more interesting school lunches for my girls as we go in to week 2. Miss Prep isn't a fan of bread so I thought I'd try to make something to capture her imagination a little.
Any recipes, TMX or not...?
12
« on: January 25, 2010, 03:14:57 am »
Last week I got an e-mail from TMX Oz that I think included a TMX recipe for a chewy banana slice or similar. Had chopped dried banana chips and shredded coconut in it, and it was a no-bake jobby. Has anyone got this recipe? I'm pretty sure it was in the e-mail with cooking class updates but I seem to have permanently deleted it. If you could forward it to me that would be great depome77 at netspace dot com dot au
13
« on: January 16, 2010, 03:02:12 am »
Mississippi Mud Cake - Serves 10 Will keep for up to one week in an airtight container in the fridge. (I have read previously that mud cakes get better with age, with one week being optimum) Based on Australian Women's Weekly Recipe from their mini book, Chocolate Cakes. Use any chocolate or coffee liqueur that you like. I didn't have any, any my DH hates coffee, so instead of using 80 ml of liqueur and 250 g of water, I used 30 g of brandy (which I had) and 290 g water. My ingredients:250g butter sliced 150g dark eating chocolate broken into squares 440g caster sugar 290g hot water 30g brandy 1 tbsp instant coffee powder 220g plain flour 40g self-raising flour 25g cocoa powder 2 eggs Preheat oven to moderately slow - 160 degrees. Grease deep 20cm cake tin on bottom and sides. Do NOT use a springform tin. It all came leaking out of the base of mine Combine butter, chocolate, caster sugar, hot water, liqueur and coffee powder in the bowl and mix at 37 degrees for 3 minutes, beginning on speed 1 while the hard ingredients are incorporated, and increasing to speed 3 to get the butter to melt. When the chocolate has melted and the butter is fully incorporated, set aside for 5 minutes to cool a little more. Insert butterfly, then add flour and cocoa powder. Mix on speed 4 for 10 seconds, then scrape down the sides with the spatula and add both eggs. Mix again for 20 seconds on speed 4. Pour mixture into prepared pan and cook for 1 1/2 hours. Stand in pan for 30 minutes before turning onto wire rack to cook. Turn cake top-side-up to cool. Cover cake loosely with foil about half way through cooking if it is browning too quickly. Spoil yourself and serve it with a dollop of King Island Dairy cream, or other dairy delight N.B. Mine is in the oven at the moment, but the batter looked very good so I'm optimistic about this as one of my desserts for guests tomorrow night members' commentskatesjoy - Made this with Frangelico and hazelnuts - delicious and moist. Not heavy at all. I only put in 1 Tbs of ground hazelnuts but would probably use 2 next time (there will absolutely be a next time).
14
« on: January 13, 2010, 09:41:46 am »
We're having a family of 5 over for a BBQ this weekend, so I thought cooking a whole chook would give me a head start in the protein department. I have never cooked a chook on the BBQ before, however, so I thought I'd ask here for:
1. info about how to, dos and don'ts
2. a suitable marinade/glaze
Any tips?
15
« on: January 10, 2010, 03:25:10 am »
Name of Recipe:Lamb Rogan Josh Adapted from A Commonsense Guide to Healthy Cooking, by Murdoch Books Number of People: 4-6 adults Ingredients:1 1/2 tbsp coriander seeds 3 tsp cumin seeds 1 tsp dried cloves 2cm piece of fresh ginger 3 cloves garlic 2 medium onions 1 tbsp oil 130g plain yoghurt 1 tsp chilli powder 1 tsp ground cardamom 1 tsp ground turmeric 400g tin tomatoes 1kg diced lamb 1 tsp garam masala 30g (1/4 cup) slivered almonds (optional) chopped fresh coriander leaves to garnish N.B. If you are using the slivered almonds as a garnish with the coriander leaves, then dry fry them first in the TMX for about 4 minutes. Preparation:Add coriander seeds, cumin seeds and cloves and roast for 2 minutes at 100 degrees on speed 1, then mill for 2 minutes on speed 8. Remove and set aside. Add peeled ginger and garlic and chop for 10 seconds on speed 7. Add onion to the bowl and chop for 5 seconds on speed 7. Add oil and cook for 5 minutes at varoma temperature on speed 1. With blades running on speed 1, but no temperature selected, remove MC and add yoghurt, chilli, cardamom and turmeric through the lid, as well as the spices that you set aside earlier. Then add the can of tomatoes, replace the MC and chop for 5 seconds on speed 7 (if using whole tomatoes). Add 1 tsp salt and now cook for 5 minutes at 100 degrees on speed 1. Add the lamb and cook with MC in place for 60 minutes at 100 degrees on + speed 1. Remove the MC, place the steamer basket on top and cook for a further 15-30 minutes at 100 degrees on + speed 1, until the sauce is thickened enough for your taste. Add the garam masala in the last 5 minutes of cooking. Serve sprinkled with optional almonds, and fresh coriander. Sorry didn't get photos last night as everyone scoffed it down too quickly! As usual, I put it all in the thermoserver while I steamed some basmati rice. I've been using this recipe for almost 8 years so it is very much tried and tested, but last night was the first time that I've made it in the TMX. All good members' commentslizzyG - I have made this three times now and it's absolutely wonderful. Thank you so much for this recipe. I really appreciate it. Twitterpated - Wow what a great recipe. Very tasty and a nice mix of spices. Thanks for posting a recipe that will be used again and again in our house. P.S. To anyone thinking of making this it is quite spicy even though I cut back the chilli to 3/4 teaspoon.
|
|